Set your Psoas free to regain your swagger
Is your back tight? Do you sit a lot and have not so great posture? Did you just sit up straight? Let me introduce you to a muscle that can help your hips regain the ability to properly move in their full range. The psoas (pronounced “SO-az”) is a large and powerful muscle that is responsible for stabilizing the base of your spine. It actually connects up with another muscle called the iliacus and together they are called the iliopsoas (“Ill-ee-oh-SO-az'”). It can affect lots of people anywhere from office workers who sit a lot to active individuals especially runners, cyclists and rowers.
A tight or strained psoas can lead to lower back pain and can limit your free range of motion. Worse, a tightened psoas can put pressure on the lumbar vertebrae, leaving you susceptible to injury.
Look at the muscle anatomy picture below. As you can see, this muscle covers some real estate: Attaching superiorly at the spine (to the transverse processes and lateral surface of thoracic vertebra 12 to the last lumbar vertebra and corresponding discs) and traversing down and forward through the pelvis to attach to the inside of the upper leg (lesser trochanter). Understanding and visualizing the position of this muscle should help you appreciate the relationship of the psoas to the function of the trunk/spine, pelvis, and extremities.
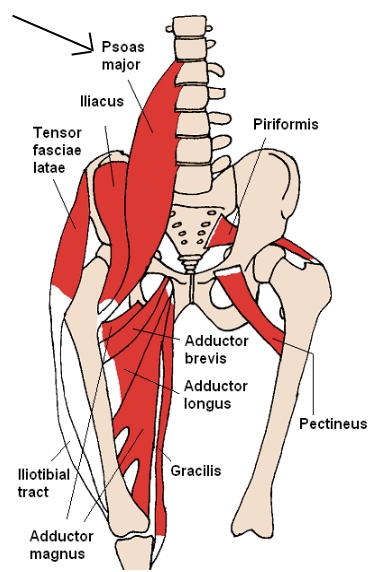
Here are some other places that the psoas can refer to: (referral pain can be felt at a site other than where the cause is situated)
- groin
- upper thigh
- contributes to scoliosis
- abdomen
- genitals
- stiffness in hips or groin in morning when you get up
- rotates legs outward
- can’t stand up straight
- stooped posture
- leaning to one side
It is involved in everything! As soon as I began to respect the stress and excessive loads that I was placing on my psoas (there are two, one on each side), my groin strain went away and so did my back and SI pain. SI is sacroiliac and refers to the SI joint. I injured this when I had laxity in my joints post-miscarriage between having my two boys as my body still had some the hormone relaxin. Because of my previous SI joint injury, as well as an old hamstring injury from college cross country, I have to be ever diligent on self care to keep active and injury free.
Releasing the psoas muscle is a relatively simple procedure that requires just a few minutes of your time and the use of a small ball. The psoas is actually located under your intestines. To work it, you may need to come in at an angle. Look at the picture below and see where I have the ball located. To really get in there you may have to bring the opposite knee out to the side of your body as to put more weight on the ball. Bring the knee up towards your ear until you feel the right amount of pressure.
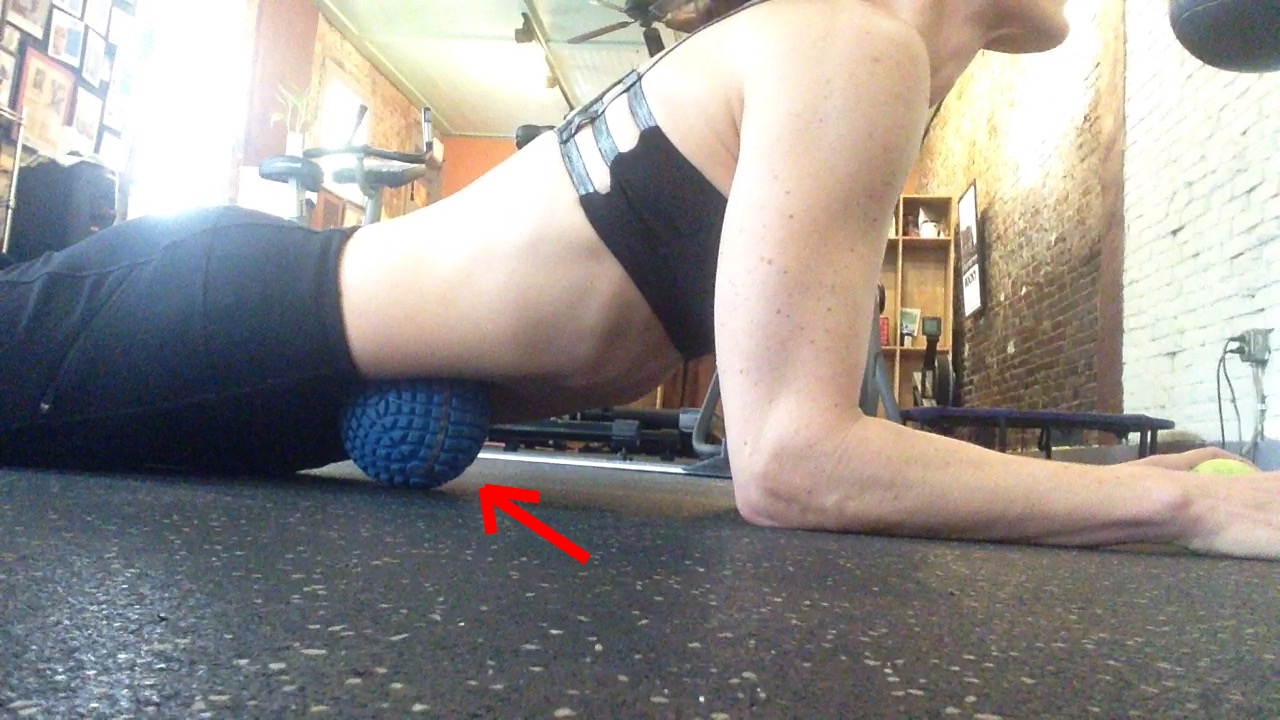
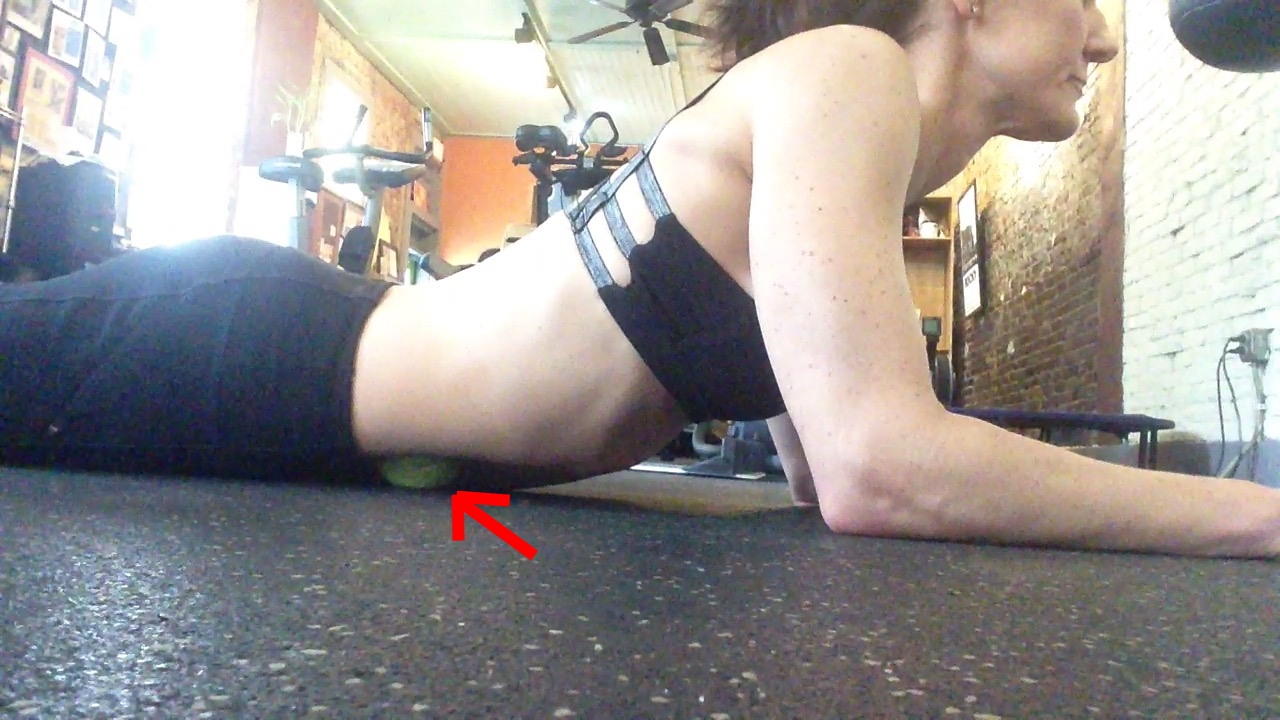
- Place a small soft ball on the floor. The ball should be slightly larger and softer than a tennis ball.
- Lower yourself onto the small soft ball, about one to two inches outside of your belly button, near the area that hurts. You will feel a slight discomfort as you lower yourself, this is your psoas responding to the pressure. Hold for 20-60 seconds. Once you feel the discomfort fade then roll inside or 2″ up or move ball over laterally as to get other parts of the muscle. If I get lazy and don’t do for a while then it’s a bit more than slight discomfort, in fact it’s darn right breath-takingly painful. This short lived pain is worth the long term pain relief from setting my psoas free. 🙂 If you get in the habit of doing this in the beginning every other day the pain will lesson and you can then say do only on Sundays, or for runners before and after an intense running session.
- Come up on your elbows and arch your back. This action will cause a more forceful stretch and, in turn, will cause your psoas to release.
- Visit your physical therapist if the discomfort persists. This is the most effective way to loosen your psoas.
- You can avoid a strained psoas by regularly engaging in stretching exercises which promote flexibility and mobility.
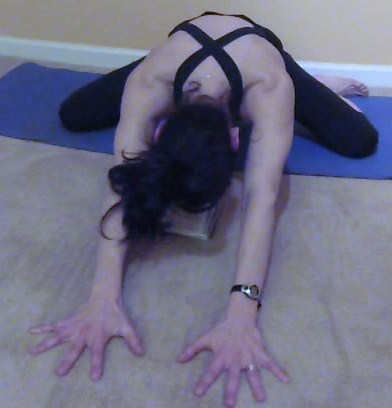
- Try the stretch below on the left that I call “Frog Pose” for the adductors (inner thigh muscles). Kneel with your toes pointing out to the sides; rest your elbows or hands on the floor. Exhale, spread your knees, and lower your chest to the floor as you extend your arms parallel and forward. Note: this stretch is one of the most intense for the adductors. If you’re extremely flexible, you will be able to lower into a straddle split with your knees flexed. I have yet to see normal people do this, including myself! Breathe and hold these stretches anywhere from 30 seconds to 3 minutes. Yes, I said 3 minutes… ouch!!
- Another stretch below you may want to try that also helps to release and keep that psoas from staying locked up is the hip flexor stretch (the bottom right 2 pictures). Be sure to tuck your butt/hips under and keep your posture straight. For a more intense stretch as if it doesn’t hurt enough raise the arm to the ceiling of the leg that is back.

Not a client? Live in town and interested in our personal training or nutrition coaching? Click here for a FREE Consult (value $87) or give us a call at 901-466-6242
Check out our customized online training ($40-$80) here: Online Customized Training
Interested in our Massage or Body Wraps? Click here.
Energy Fitness, 552 South Main, Memphis, TN
Tonya Tittle, M.S., ACSM
Owner/Dir. of Training

